Ever craved a warm, savoury snack that’s ready in under 30 minutes? Let me share my go-to cheese muffins – golden, garlic-infused bites that’ll transform your busy days. Inspired by Mediterranean flavours, this recipe skips the fuss but delivers big on taste. Perfect for lunchboxes, picnics, or last-minute guests.
I’ve baked these weekly for years – they stay moist for days and adapt to whatever’s in your fridge. Fancy sun-dried tomatoes? Feta? Throw them in. The base mix works like a charm, whether you’re craving something herby or extra cheesy. Trust me, it’s the ultimate no-fuss baking hack.
Below, I’ll walk you through my fail-proof method, from pantry staples to clever add-ins. You’ll get step-by-step guidance, personal tweaks, and storage tips. Let’s turn that oven on!
Key Takeaways
- Quick prep: Ready in 25 minutes – ideal for hectic schedules
- Versatile base recipe adapts to Mediterranean or British flavour twists
- Stays fresh for 3 days – perfect for packed lunches
- Customise with olives, mature cheddar, or roasted peppers
- Freezer-friendly – bake ahead for grab-and-go snacks
Introducing a Quick and Cheesy Treat
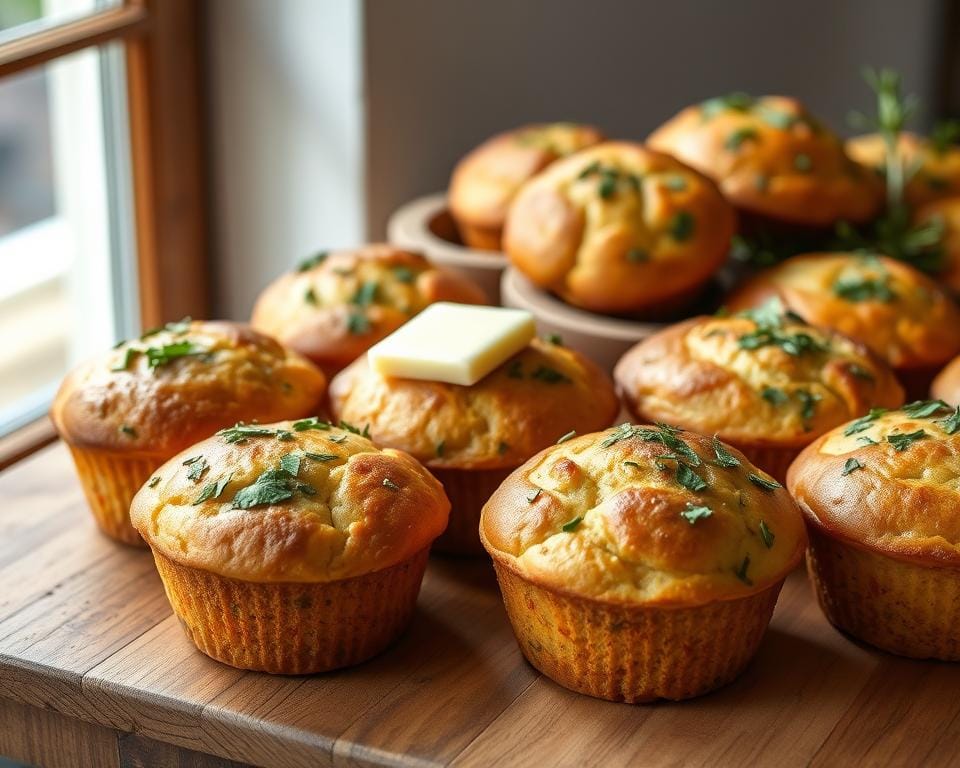
There’s something magical about pulling golden, cheesy bites from the oven while the garlic aroma fills your kitchen. These little wonders became my secret weapon during midweek rushes – they’re ready before my kettle boils for a cuppa. What started as a fridge-clearance experiment turned into a weekly ritual my family now demands.
Why I Love Savoury Muffins
Their speed won me over first. With just 15 minutes of prep and 18-20 minutes in the oven, I’ve got a batch hot enough to melt extra cheddar on top. But it’s the adaptability that keeps me hooked. Last Tuesday’s leftover roast peppers? Chopped into the batter. Forgotten feta in the back of the fridge? Crumbled right in.
The Versatility of Flavours
I’ve found the base mix – 1 ¾ cups flour, 2 tsp baking powder, and a glug of olive oil – works with almost anything. My current favourite combo: black olives and sun-dried tomatoes with a garlic butter glaze. For meat lovers, diced ham or crispy bacon adds a smoky punch. The key is keeping wet and dry ingredients balanced – too much oil makes them greasy, but a 50/50 butter-olive oil blend gives that perfect crumb.
Pro tip: Line your tin with baking paper squares instead of cases. It prevents sticking and gives those crisp edges we all fight over!
Essential Ingredients for Amazing Savoury Muffins
What’s in your cupboard right now? My golden rule for stress-free baking starts with quality staples that do the heavy lifting. Let’s break down the core components – no fancy gadgets required, just a trusty mixing bowl and your hands.

Dry Ingredients and Their Roles
Self-raising flour forms the backbone – its pre-mixed raising agents give that airy lift. I always sift 1¾ cups to avoid lumps. Two tsp baking powder? Non-negotiable. It’s the secret to the perfect rise without yeast fuss. A pinch of salt balances flavours, but I’ll sometimes swap in smoked sea salt for depth.
Wet Ingredients: Creating the Perfect Batter
Room temperature milk binds everything smoothly – cold liquids can make the batter seize. I use a 50/50 mix of olive oil and melted butter for richness without greasiness. One large egg adds structure, while a dollop of Greek yoghurt (or sour cream) keeps things tender.
Pro tip: Mix wet and dry ingredients in separate bowls first. A few lumps are fine – overmixing leads to toughness. Fold in 100g grated mature cheddar last for pockets of melty goodness. Fancy bacon bits or diced ham? Toss them in now for extra oomph.
Step-by-Step Instructions for Baking Savoury Muffins
Let’s roll up our sleeves and get baking – I’ll guide you through each stage to ensure golden perfection every time. Whether you’re using a standard 12-hole tin or fancy silicone moulds, these pointers will help you nail the texture.
Mixing Techniques to Achieve a Soft Crumb
First, grab two large bowls. In one, whisk together your dry ingredients – I sift 210g self-raising flour with 2 tsp baking powder and a pinch of salt. In the other, beat 1 egg with 150ml milk (room temperature!), 60ml olive oil, and 2 tbsp melted butter until smooth.
Now, the golden rule: fold wet into dry with a spatula. Stop when you see just a few flour streaks – overmixing activates gluten, leading to tough results. A lumpy batter is actually ideal! Gently stir in 100g grated cheddar last for those molten pockets.
Baking Times and Oven Settings
Preheat your oven to 200°C (180°C fan). While it heats, grease your tin with butter or line with greaseproof paper squares. Use an ice cream scoop to divide the batter evenly – fill each hole ¾ full.
Bake for 18-20 minutes until domed and golden. Rotate the tin halfway if your oven has hot spots. They’re done when a skewer comes out clean, but the tops should still feel springy. Let them cool for 5 minutes in the tin before transferring to a rack – this prevents soggy bottoms!
Personal Tips and Tricks for Customising Your Muffins
My kitchen experiments taught me that the magic lies in the mix-ins. Whether you’re raiding the fridge or planning ahead, the right additions can turn a simple batter into something spectacular. Let me share the combinations that make my taste buds sing.

Choosing Add-Ins for Extra Zest
For a salty kick, I fold in diced ham or crispy bacon – both pair beautifully with mature cheddar. Crumbled feta adds tangy bursts, especially when balanced with caramelised onion. Last week’s batch featured roasted garlic cloves, which melted into golden pockets of flavour.
When using wet ingredients like sundried tomatoes, I reduce the milk slightly to keep the batter from becoming soggy. A precise tsp baking powder measurement ensures proper rise even with heavy add-ins. My secret? A knob of melted butter brushed on top before baking creates an irresistible crust.
Quality greaseproof paper liners are non-negotiable in my kitchen – they prevent sticking without absorbing precious oils. I buy unbleached ones from my local bakery supply shop. This small upgrade means every bite releases cleanly from the case.
These tweaks let me create something new each time while keeping the process joyfully simple. Yesterday’s version had smoked paprika-infused olive oil and diced chorizo. Tomorrow’s might feature stilton and pear. What’ll yours be?
Overcoming Common Baking Challenges
We’ve all been there – pulling treats from the oven only to find them dense or crumbly. Let’s tackle two frequent hiccups I’ve encountered, starting with the silent batter saboteur: overmixing.
How to Keep Your Bakes Tender
Stop the stir madness: Once wet and dry ingredients meet, work quickly but gently. I use a silicone spatula to fold until just combined – those floury streaks? They’re your friends! Overworked batter develops gluten, turning fluffy bites into hockey pucks.
Dryness often creeps in during storage. My go-to fix? Cool completely before tucking them into an airtight container lined with kitchen paper. This absorbs excess moisture while keeping them soft for up to three days. For longer freshness, wrap individual portions in foil first.
Here’s a game-changer I discovered: even 30 seconds less mixing can transform the texture. Test it yourself – next batch, stop when you think it’s almost mixed. Those imperfectly blended bits create pockets of tenderness.
Fancy a flavour boost without compromising texture? A cheeky pinch of garlic powder mixed into dry ingredients adds depth without altering moisture levels. Just remember – fresh garlic contains water, so adjust wet ingredients slightly if using.
Serving Suggestions and Storage Advice
Picture this: a lazy Sunday brunch where golden bites emerge from the oven, their steam mingling with freshly brewed tea. Whether you’re hosting friends or packing lunches, these cheesy wonders shine brightest when served warm. Let me share my favourite ways to plate them up and keep them tasting fresh.
Brunch Brilliance & Snack-Time Magic
For weekend spreads, I slice them open while warm and add a smear of cream cheese with chives. They pair beautifully with tomato soup or a crisp salad. At casual gatherings, I arrange them on a wooden board with olives and cured meats – guests always raid this corner first!
Keeping That Fresh-Baked Feel
Cool your batch completely on a wire rack before storing. I use an airtight container lined with greaseproof paper – they’ll stay moist for 3 days this way. For longer storage, wrap individually in foil and freeze for up to 2 months.
| Storage Method | Duration | Reheating Tip |
|---|---|---|
| Room temperature | 8 hours | Cover with a tea towel |
| Airtight container | 3 days | 10 secs in microwave |
| Freezer | 2 months | 180°C for 12 mins |
Pro tip: If using paper cases, remove them before freezing to prevent sogginess. A quick blast in a hot oven restores that just-baked texture beautifully. I’ve even crisped up day-old batches this way for impromptu picnics!
Savoury Muffins Recipe: A Personal Touch to a Favourite Snack
Cheese transforms these bites from simple to spectacular – here’s how I craft my signature blend. Through endless kitchen trials, I’ve discovered that texture contrast makes all the difference. A mix of sharp cheddar for punch and creamy mozzarella for stretch creates that irresistible pull with every bite.
Enhancing the Flavour with Cheese Variations
My current obsession? Combining crumbled feta with caramelised onion. The saltiness cuts through the richness, while a dash of smoked paprika adds depth. For those who prefer milder flavours, grated Gouda melts beautifully into the batter without overpowering other ingredients.
When using juicy add-ins like sundried tomatoes, I reduce the oil slightly to maintain structure. Diced ham works wonders when pan-fried first – that crispy edge adds a satisfying crunch. Always fold extras into the batter last to prevent colour bleeding.
| Cheese Type | Flavour Impact | Best Paired With | Melting Quality |
|---|---|---|---|
| Mature Cheddar | Bold, tangy | Bacon, spring onion | Crumbly |
| Feta | Salty, creamy | Spinach, olives | Soft pockets |
| Mozzarella | Mild, buttery | Basil, cherry tomatoes | Stringy |
| Gouda | Nutty, sweet | Ham, mustard | Smooth |
Paper liners are my non-negotiable for achieving crisp edges around the holes. They prevent sticking better than greasing alone. When measuring cups, I use the spoon-and-level method for accuracy – too much flour leads to dryness.
Why not try brown butter next time? Swapping regular melted butter for nutty browned versions adds caramel notes. It’s these little tweaks that let you put your stamp on the basic formula. What combination will you invent today?
Conclusion
In my kitchen, these golden bites have become more than just a snack—they’re a canvas for creativity. Whether you’re folding crispy bacon into the batter or sprinkling feta over garlic-infused dough, the magic lies in balancing simple techniques with bold flavours. Remember: gentle mixing keeps them tender, while that hot oven gives that irresistible rise.
Stash cooled batches in an airtight container—they’ll stay moist for three days, though I doubt they’ll last that long! The real beauty? How they adapt to whatever’s in your fridge. Swap in caramelised onion one week, roasted peppers the next. Each tweak feels like inventing something new.
I’d love to hear how you make these your own. Tag me on Instagram with your cheesy masterpieces or clever add-ins. Happy baking—and even happier snacking!