You want a quick, comforting bake that fits a busy morning or a slow afternoon — and the Easy Welsh Cake Recipe gives exactly that with minimal fuss.
I’m Gemma, and I blend travel stories with practical tips to help you make perfect welsh cakes at home. These scone‑like rounds cook in a hot pan in minutes, using simple ingredients like self‑raising flour, butter, caster sugar, egg, a splash of milk and sultanas.
I’ll walk you through the exact order to mix, roll and cook so your cakes turn out golden and tender every time. Expect small, smart tweaks — heat control between batches and using a cutter for neat rounds — that make a real difference.
Key Takeaways
- Fast and reliable: short prep and about 2–3 minutes per side on the griddle.
- Uses pantry ingredients you likely have on hand.
- Great served warm with a cup of tea.
- Simple adjustments keep results consistent between batches.
- Perfect for weekday treats or a relaxed weekend bake.
A cosy bake: why I love making Welsh cakes on a griddle or pan
Pull up a stool—let me tell you why a hot griddle and a simple pan make these treats feel like home. I still remember the first time I used a bakestone; that heavy cast iron spread the heat evenly and gave each round a deep, caramel colour in about 2–3 minutes per side.
Nothing feels more homely than welsh cakes sizzling on a warm griddle—don’t you love that gentle hiss as the dough kisses hot iron? I usually dust the board with a little flour, cut neat rounds and listen for the edges to set before I flip.
- Even colour: a heavy pan keeps centres soft and edges golden.
- Simple ritual: heat the griddle, brew a pot of tea, and enjoy the moment.
- Quick cooking: each cake needs only minutes, so you can chat while you work.
Prefer a frying pan? Great—space and steady heat matter most. Shall we get set up so your first welsh cakes come off the griddle golden and ready to share?
Ingredients, kit and timings for welsh cakes at home
Let’s get the ingredients and kit ready so you can move from mixing to cooking without fuss. Clear measures and simple tools speed everything up and keep the process calm.
Simple ingredients
Shopping list: 225 g self-raising flour, 110 g salted butter (cubed), 85 g caster sugar, 1 medium egg, a few drops whole milk if needed and 55 g sultanas. If you use unsalted butter, add a small pinch of salt so the flavour stays lively.
Essential kit
- Weighing scales and a large bowl for mixing.
- Fork, rolling pin and a 7.5 cm cutter for neat rounds.
- Nonstick frying pan or a heavy cast iron griddle/bakestone and a spatula.

Yields, timings and heat control
| Yield | Cook time | Notes |
|---|---|---|
| About 18–20 rounds | 2–3 minutes per side | Roll to ~5 mm; medium heat |
| One batch | Total ~20–25 minutes | Watch pan heat between batches |
Tip: Measure first, then work. A steady pan temperature gives even, golden brown cakes — too hot and they scorch, too low and they dry out.
Easy Welsh Cake Recipe: step-by-step you can trust
Grab your large bowl and let’s turn flour and butter into a soft, ready-to-roll dough. Start by tipping the flour into the bowl and adding the cubed butter.
Rub with your fingertips until the mix looks like fine breadcrumbs. This gives tender welsh cakes and a light texture.
- Stir in the caster sugar and the beaten egg. If the dough seems dry, trickle in a little milk until it holds together.
- Fold through the sultanas gently so the mixture stays even — fruit in every bite, not clumps.
- Lightly flour the surface, roll dough to about 5 mm and press out neat rounds with your cutter. Re-roll trimmings once.
- Heat a cast iron griddle or bakestone and cook each round for 2–3 minutes per side until golden brown.
- Using a dry frying pan? Keep the pan clean and at medium heat. Watch between batches to avoid scorching.
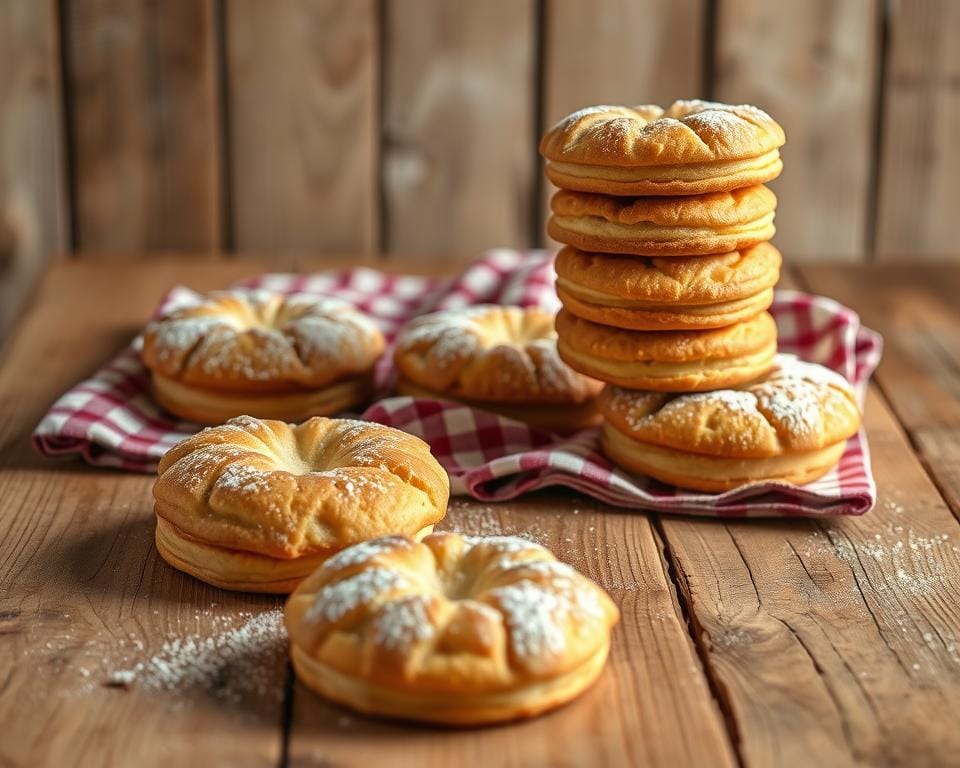
Visual cue: the outside should be caramel‑brown and the centre fluffy, not doughy. Let the cakes rest a minute — the fruit gets very hot. Serve warm and enjoy.
Smart tips, swaps and troubleshooting for perfect welsh cakes
Small tweaks make a big difference — let me show you how to steady the pan and the dough.
Keep it even: control temperature
Watch the griddle or pan. Too much heat scorches the outside while the centre stays raw. I lower the flame between batches and aim for steady temperature. That gives even colour in about two to three minutes per side.
Swaps and flavour ideas
If you fancy a change, swap sultanas for raisins or currants — soak them to plump if you can. A pinch of mixed spice, cinnamon or nutmeg adds warmth. For a cocoa twist, add a spoon of cocoa and add little extra milk so the dough stays soft.

Dietary notes and fixes
Standard mixes are vegetarian. For gluten‑free, use a blend with xanthan gum. For dairy‑free or vegan versions, swap butter and egg for plant alternatives and check the flour and sugar list.
- If the mixture feels tight or crumbly, add little milk and fold gently — softer dough cooks well.
- Dry or crumbly cakes often need more sugar‑moistened dough; add a splash of milk next time.
- Dense texture? Fresh self-raising flour and prompt cooking help; a pinch of salt brightens flavour.
- No cutter? Use a glass rim. No griddle? A heavy frying pan works — just mind the heat.
| Problem | Likely cause | Quick fix | Result |
|---|---|---|---|
| Scorched outside | Pan too hot | Lower heat; wipe pan between batches | Even colour on cakes |
| Raw centre | Heat too high/short cooking | Lower temperature; add a minute per side | Cooked centre, no burn |
| Dry or crumbly | Under‑hydrated dough | Add little milk; handle gently | Soft, tender cakes |
| Dense texture | Old flour or long rest | Use fresh flour; shape and cook promptly | Light, fluffy cakes |
Store, reheat and freeze: make the most of your welsh cakes
If you like having a stash ready, here are simple ways to store, freeze and reheat so nothing goes to waste. These tips help you plan baking and keep each treat tasting fresh for friends and family.
Short-term storage
Cool completely before you tuck the rounds into an airtight tin. Stored in a cool, dark cupboard they keep well for up to a week and stay soft without losing their charm.
Make-ahead dough
Want to cook cakes fresh later? Wrap the dough tightly and chill for up to a day. This saves time and still gives you warm, just‑cooked results when guests arrive.
Freezing and defrosting
For a bigger batch, freeze only once cooled. Layer the rounds with parchment so they don’t stick and seal in a freezer bag. They keep up to three months.
Defrost overnight in the fridge for best texture. If you’re short on time, a gentle microwave burst or a low toaster setting will do—watch closely because the fruit heats fast.
Best ways to serve next day
- Reheat from room temperature in a hot oven for about five minutes to regain a pastry‑like softness.
- Pop them in the toaster for a quick crisp edge — keep an eye so they reach golden brown, not burnt.
- Quick microwave: ~15 seconds for a fast warm-up; leave to rest a minute as fruit becomes very hot.
- Or rewarm in a pan on very low heat, moving them often so the base doesn’t over-toast while you chase the right temperature.
| Storage | Method | Time |
|---|---|---|
| Short term | Airtight tin, cool dark cupboard | Up to 1 week |
| Make-ahead dough | Tightly wrapped, chilled | Up to 1 day |
| Frozen | Layer with parchment in a bag | Up to 3 months |
Conclusion
One last thought: these simple bakes can make an ordinary day feel a little kinder.
With self-raising flour, butter, sugar, a pinch of salt and a few sultanas you get golden rounds in minutes on a hot griddle or iron surface. Keep the mix gentle, roll to about 5 mm and mind the heat.
Use a favourite pan or a bakestone — both work. Serve warm with tea and invite people to join. Store well and reheat gently when you need a quick treat the next day.
I hope this recipe gives you confidence to make a cake that feels like home. Tweak flavours, jot down what you love, and enjoy the small ritual of baking and sharing.