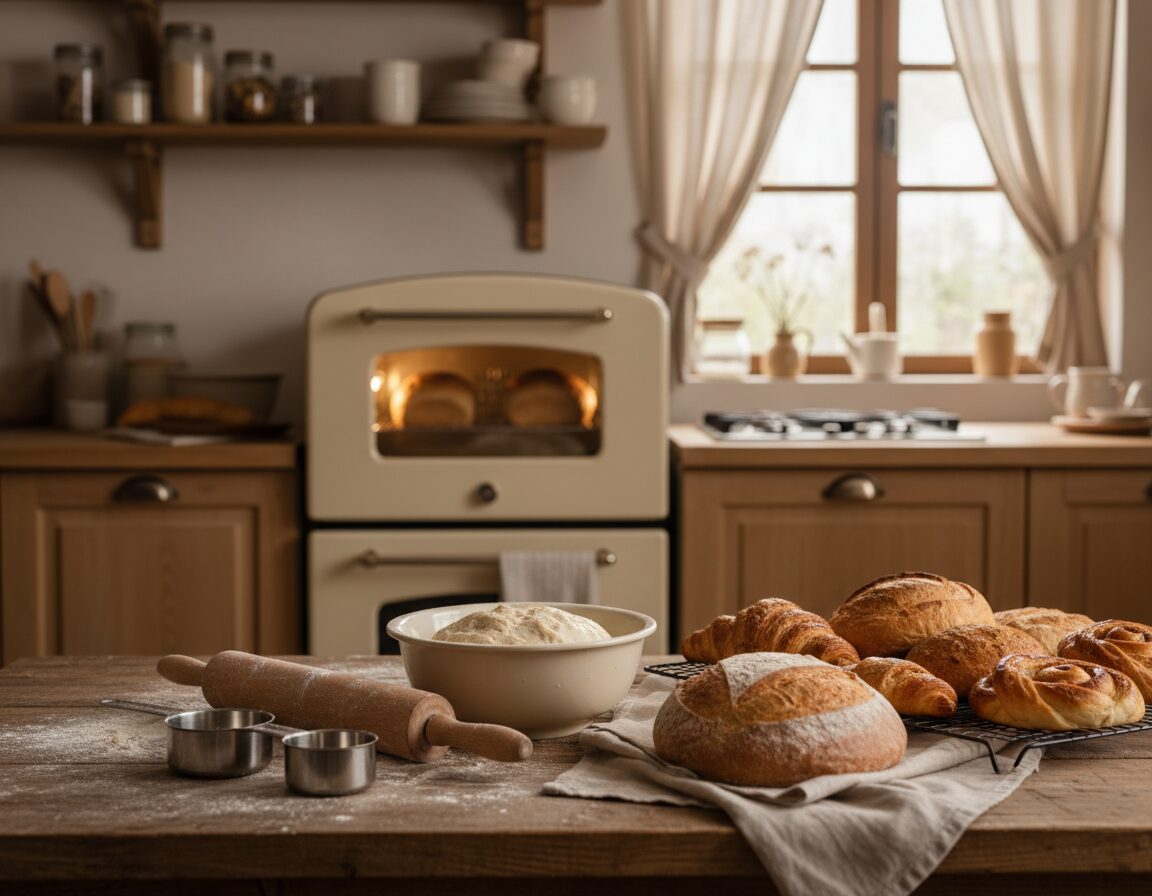
I use the phrase home baking basics because that’s what I reach for on a busy weeknight—practical, repeatable steps that get tasty results without drama. I keep things simple: weigh ingredients, preheat the oven properly (allow 10–15 minutes), and get organised so mid-bake surprises don’t derail the bake.
I write as someone who bakes in a small UK kitchen. I treat baking as a set of controllable variables—equipment, measurement, oven behaviour, ingredients and mixing—rather than talent. That mindset reduces stress and makes good outcomes more reliable.
Expect a short, practical guide with clear tips you can use immediately. I’ll flag common slip-ups I see: wrong tin sizes, missing parchment, or an oven that runs hot. If you need a quick reference when you have questions mid-recipe, this is it — and for lighter weekend treats I sometimes follow a fluffy American pancake riff I like fluffy American pancakes.
Key Takeaways
- Read the recipe and weigh ingredients for consistency.
- Preheat the oven and allow 10–15 minutes for true temperature.
- Treat baking as controllable steps, not talent.
- Keep simple tools and label tins to avoid mix-ups.
- Use this guide as a quick reference when you have questions.
Setting myself up for success with a small-but-mighty baking kit
You don’t need every gadget—just a few reliable pieces that earn their place. I keep my kit compact and budget-aware so I can make more and worry less.
What I genuinely consider essential equipment for beginners
Digital scales come first for me—grams and tare make a real difference to results. Cups vary wildly between bakers, so I weigh flour to avoid dense cakes.
Mixing bowls, spatula, whisk and sieve
I use a set of metal and heatproof bowls so I can melt chocolate over a pan. A flexible spatula saves batter from sticking. A sieve stops lumps and keeps crumb light.
Tins and trays that matter most
You only need a few pans to start: a round cake tin (springform helps release), a loaf tin and a good baking sheet. Dark silicone or dark tins brown faster—I lower oven time slightly for those.
Parchment paper and a cooling rack: the prevention duo
Parchment stops sticking and overbrowning. A cooling rack prevents soggy bottoms by letting air circulate—two inexpensive items that save so many beginner mistakes.
Hand mixer vs stand mixer: a simple comparison
| Task | Hand mixer | Stand mixer |
|---|---|---|
| Most cakes & creams | Plenty | Overkill |
| Large batches / repeated creaming | Tiring | Worth it |
| Space & budget | Compact | Bigger investment |
- Starter kit I use: digital scales, mixing bowls, sieve, spatula, whisk, round tin, loaf tin, baking sheet, parchment, cooling rack.
- Borrow a stand mixer until you bake very often—save money and cupboard space.
How I read a recipe so nothing surprises me halfway through
Before I touch a single spoon, I read the whole recipe from top to bottom—slowly enough to spot the tricky bits. That short pause saves time later and keeps the bake calm.
The quick “read-through” I do before I touch any ingredients
I scan for chilling or proving time, oven temperature and tin size. I look for stages that need cooling before the next step.
Then I turn the instructions into a simple timeline so I know when things must go in or come out.
Why I don’t substitute on the first attempt
I avoid swaps until I know what the original tastes and looks like. Substitutions can change texture and rise.
I only tweak after I’ve tried the recipe and answered my own questions about outcome and balance.
Getting organised: lining up ingredients, timers and a clear sink
I mise en place: measure ingredients in order and put tools ready. I set timers a few minutes early because ovens vary.
Finally, I clear the sink so washing while something bakes doesn’t become a distraction. If I get stuck mid-recipe, I pause and re-read the instruction before moving on.
Getting to know my oven for better baking results
I learn an oven’s personality by testing it, not guessing from the dial. Small checks save time and give steadier results when I’m cooking for the week or a quick treat.

Finding hot spots with a simple bread test
I lay slices of bread on a tray and bake for a short time. The pieces that brown first show me where the oven runs hot.
That tells me if I should rotate trays or avoid placing a tin near the top or bottom edge.
Preheating and shelf rules
I always preheat for 10–15 minutes. Going in too early can ruin rise and texture.
My default is the middle shelf unless a recipe asks for higher heat to brown the top.
Thermometer, fan ovens and avoiding the door
An oven thermometer exposed real miscalibration for me—what the dial said and the actual temp often differed. For fan ovens I drop the temperature by about 15°C and watch timing closely.
I avoid opening the door. Instead I use the oven light, check through the glass and set an earlier timer so I only open when ready to act.
Ingredients that make or break beginner bakes
Small choices in what I buy change how a cake rises and how cookies chew. I shop with simple checks on the packet and keep a small storecupboard so I can reach for the right ingredient without fuss.
Flour and why type matters
Flour varies by protein. Bread flour gives structure for loaves but can toughen a cake. Plain (all-purpose) flour is my default for cakes and cookies.
For bread I choose higher-protein flour. For a tender cake I stick to lower-protein plain flour and weigh it.
How sugar changes texture
Sugar isn’t just sweet. White sugar helps cookies crisp at the edge. Brown sugar keeps them soft and chewy because of the molasses.
I pick sugar to match the texture I want rather than swapping blindly.
Room-temperature routine and leavener tests
I take eggs and butter out about an hour before baking, or speed it with short bursts in the microwave for butter (gentle only) or a bowl of warm water for eggs in their shell.
To test bicarbonate of soda I add a little vinegar—vigorous bubbles mean it’s active. For baking powder I drop a pinch into hot water—fizzing is good.
- Quick checks I use: weigh flour, choose sugar for texture, test leaveners, and buy chocolate I enjoy.
- Keep plain flour, caster sugar, and a block of proper chocolate in the cupboard—they cover most recipes in UK supermarkets.
| Ingredient | Typical use | Effect on texture | UK shopping note |
|---|---|---|---|
| Plain flour | Cakes, cookies, quick breads | Tender crumb when weighed | Widely available; use strong for bread |
| Bread/strong flour | Yeasted loaves | More chew and structure | Keep for regular loaf-making |
| White sugar | Cookies, creaming | Crisper edges, lighter rise | Caster or granulated both work |
| Brown sugar | Cookies, some cakes | Softer, chewier crumb | Soft brown gives more moisture |
Mixing and handling: the techniques I wish I’d learned earlier
Most of my best tricks are about touch — how I handle butter, sugar and eggs makes all the difference.
Creaming so it’s actually fluffy
Properly creamed butter and sugar looks paler and feels airy, not gritty. I use a hand mixer or a wooden spoon — it takes a few minutes at medium speed. If it still feels grainy, keep going; the sugar should seem suspended in the fat.
Adding eggs one at a time
I add eggs one by one so the batter holds air. If the mix looks curdled, I pause and stir gently — most of the time it comes back together as each egg is absorbed.
Scrape the bowl
Scraping the sides and bottom fixes uneven texture. I do it between stages so trapped butter or sugar doesn’t leave pockets that ruin the crumb.
Folding and dry ingredients
When I fold in dry ingredients I use a whisk or spatula and make few, gentle strokes. Stop as soon as the flour disappears — that keeps the air in the batter.
Cutting fat into flour
For pastry or crumbs I want little flattened shards of butter in the flour. I use a pastry cutter, two knives or quick pulses in a food processor. Those bits melt in the oven and give flakiness.
Beating egg whites
Use a clean, grease-free bowl. Soft peaks bend, medium peaks hold a shape, stiff peaks stand tall. Stop before the mix looks grainy or starts to weep — that is overbeaten.
Knowing when to stop
Overmixing develops gluten and toughens cakes and cookies. I mix just until combined and I resist the urge to keep stirring — tender results depend on that small restraint.
- Quick visual cues: pale butter-sugar, smooth batter after each egg, no pockets of dry flour, tiny butter flakes in pastry, and glossy egg-white peaks.
| Technique | What I look for | Quick fix if it looks wrong |
|---|---|---|
| Creaming | Paler, fluffy, not gritty | Keep mixing at medium speed for another minute |
| Adding eggs | Smooth, not separated | Add eggs one at a time; whisk briefly between each |
| Folding dry ingredients | Flour just disappears | Use gentle strokes; stop early |
| Cutting in butter | Small flattened bits in flour | Pulse briefly in processor or use forks to rub in |
| Egg white peaks | Soft → medium → stiff stages | Stop before grainy texture or liquid forms |
Preparing pans properly so my cakes and bakes release cleanly
I treat pan prep like a small ritual: the right step now saves a scraped cake later.

My default is to grease, then line. I grease even non-stick tins — it avoids drama. Then I cut a round of parchment for the base. That two-step gives the best chance of a clean release.
I dust with flour when a recipe asks, but for sponge with chocolate I use cocoa instead. Cocoa stops pale streaks and keeps the surface neat.
Quick parchment trick
I fold the paper into quarters, open to mark the circle, then cut. Sometimes I lightly grease the parchment if the recipe is delicate. It takes seconds and saves time at the end.
Why pan size matters
Using a bigger tin makes a thinner, faster bake. A smaller tin gives a taller cake that needs longer in the oven. If I change the size, I start checking earlier and expect timing to shift — it always does in my kitchen.
Material and colour — what I watch for
Glass and ceramic heat slower; they can need a little extra time. Aluminium transfers heat well and gives even browning. Silicone browns less, and dark tins brown faster — so I lower temperature or shave a few minutes off the time.
- Quick rules: grease + line for reliability.
- Dust with flour or cocoa depending on the bake.
- Change pan size? Check early and adapt time.
- Even non-stick needs greasing — trust me, I learned that the hard way.
| Pan material | How it bakes | When to adjust |
|---|---|---|
| Aluminium | Even, quick heat | Follow recipe timing |
| Glass/Ceramic | Slower, gentler browning | Allow a little longer |
| Silicone | Less browning, flexible release | Watch sides for colour |
Home baking basics for cookies, cake, bread dough and quick batters
I follow a simple workflow: portion, chill, bake, check, cool. This keeps each tray predictable and cuts down on frantic rescue missions.
Portion evenly so everything finishes at the same time
Use a scoop or weigh balls of dough so cookies bake in the same minutes. A consistent size means no tiny burnt ones while the rest wait.
For chocolate chip cookies I use the same scoop every time — it saves judgement calls mid-tray.
Chill dough for shape and texture
Chilling firms the fat and lets flour hydrate. That reduces sticking and controls spread.
I plan a short chill into the timeline so it doesn’t derail an evening bake.
Bake in batches — never load dough onto a hot tray
A hot tray starts the fat melting immediately. That makes flat, over-spread cookies. I cool trays between batches and reuse cooled sheets.
Doneness cues I trust
I watch the edge colour and overall colour first. Then I do the gentle lift test with a spatula — the cookie lifts without bending or breaking.
Cooling to avoid soggy bottoms and broken biscuits
I rest cookies briefly on the tray to firm, then move them to a rack so air circulates under the bottom.
Never wrap or box baked goods until fully cool — trapped steam softens texture and ruins results.
Quick notes for cake, bread and quick batters
- Cake: watch rise and test with a skewer; avoid overmixing the batter.
- Bread dough: look for a springy feel and an obvious rise before baking.
- Quick batters: bake straight after mixing unless the recipe asks to rest.
Chocolate, microwaves and other common “uh-oh” moments I troubleshoot fast
Small disasters happen, but most are fixable with a quick tweak and a note in my recipe file.
Melting chocolate safely: microwave or simmering water
I use the microwave on medium power in short bursts. Heat for 15–20 seconds, stir, then repeat. Stop when the chocolate is about three‑quarters melted so the residual heat finishes it.
For a gentle method, I sit a bowl over simmering water — never let steam or droplets touch the chocolate. Steam causes seizing, so keep everything dry and stable.
When to rotate trays — and when not to
I rotate only if my oven shows hot spots. I turn trays quickly and move them back to the same shelf to keep temperature steady. If the oven is even, I leave things alone and trust the timing.
Dry, flat or burnt edges: quick fixes and notes for next time
- Common causes: too much flour, hot trays, wrong temperature, dark tins, or overbaking.
- Flat cookies? Chill the dough, cool trays, and use firmer butter.
- Burnt edges? Trim the edge, lower the top shelf or drop the temp slightly next time.
| Issue | Likely cause | Next-time tweak |
|---|---|---|
| Dry crumb | Overbaked / too much flour | Reduce time by 3–5 mins; weigh flour |
| Flat goods | Warm dough / hot tray | Chill dough; cool sheet between batches |
| Burnt edge | Dark tin / top shelf | Move down a shelf; lower temp 10–15°C |
I write down one change after each bake — a small tweak often fixes the results next time. If I catch a problem early, I’ll turn the oven down a little and keep an eye on the top and bottom colour rather than open the door and lose heat.
Conclusion
I find small, steady habits beat flashy tricks when I want consistent results.
Weigh ingredients, read the recipe first, preheat properly and prep tins and tools. These few habits create the reliable outcomes I aim for in my kitchen.
Repeat a recipe a couple of times—once you know how your oven behaves, timings and colour become predictable and the results improve fast.
I keep a short checklist before each bake: scales, timeline, shelf position and a clear tray. I also jot one-line notes after each bake—time, colour, any oddities—so the next attempt is easier.
It’s normal to have questions or odd outcomes. Use the oven, mixing, pans and cooling sections to troubleshoot. Baking is a skill you build—this guide and a little practice will take you a long way.