Ever wondered how to craft that crumbly, melt-in-your-mouth sweet that’s been cherished in Scotland for generations? I’ve spent years perfecting my approach to this iconic treat, blending heritage with hands-on tips anyone can follow. Whether you’re craving a taste of nostalgia or eager to try something new, this guide strips away the mystery – leaving you with a foolproof method that honours tradition without the fuss.
Growing up, I watched my gran stir batches of this buttery confection, her stories weaving through every sugary swirl. It’s more than just a recipe – it’s a edible slice of culture. With just a handful of pantry staples and a bit of patience, you’ll unlock a texture that’s halfway between fudge and shortbread. Let’s skip the complicated jargon and dive straight into creating something truly special.
Key Takeaways
- Rooted in centuries-old methods, this sweet holds cultural significance across Scotland
- Requires basic ingredients but rewards attention to temperature and timing
- Perfect for gifting or enjoying with a cuppa
- Personal anecdotes reveal the treat’s role in family traditions
- Clear guidance helps avoid common texture pitfalls
Discover the Heritage of Scottish Tablet
Few sweets carry the weight of history quite like this grainy delight from the Highlands. My earliest memories involve sticky fingers and the crackle of wax paper at family gatherings – moments when this sugary staple felt as essential as the stories shared over tea.
A Brief History of the Sweet Treat
Records trace its roots to 17th-century household manuscripts, like Lady Grisell Baillie’s handwritten notes detailing “taiblet” for special occasions. Back then, it symbolised hospitality – a luxury reserved for guests. Today, it’s the unspoken hero of school fetes and ceilidh dances, its presence as expected as tartan ribbons.
What sets it apart from cousins like macaroon bars or Edinburgh rock? Texture. Where fudge creams and candy crumbles, this holds its gritty charm. My aunt’s wedding buffet featured all three – but only the tablet tin emptied first.
| Sweet | Texture | Key Ingredients | Cultural Role |
|---|---|---|---|
| Tablet | Grainy melt | Butter, sugar, milk | Celebratory staple |
| Macaroon Bars | Crispy coconut | Potato, chocolate | Teatime treat |
| Edinburgh Rock | Powdery crunch | Sugar, flavourings | Tourist souvenir |
Modern versions stay true to their roots – no fancy gadgets needed, just a watchful eye and wooden spoon. That simplicity explains why my niece now begs to “help” stir the pot, just as I did. Every batch becomes a bridge between generations, sugar crystallising memories into something tangible.
Ingredients and Preparation Essentials
Getting the foundations right transforms this sweet from tricky to triumphant. Through trial and error, I’ve learned that success hinges on two pillars: what you use and how you use it.

Essential Ingredients
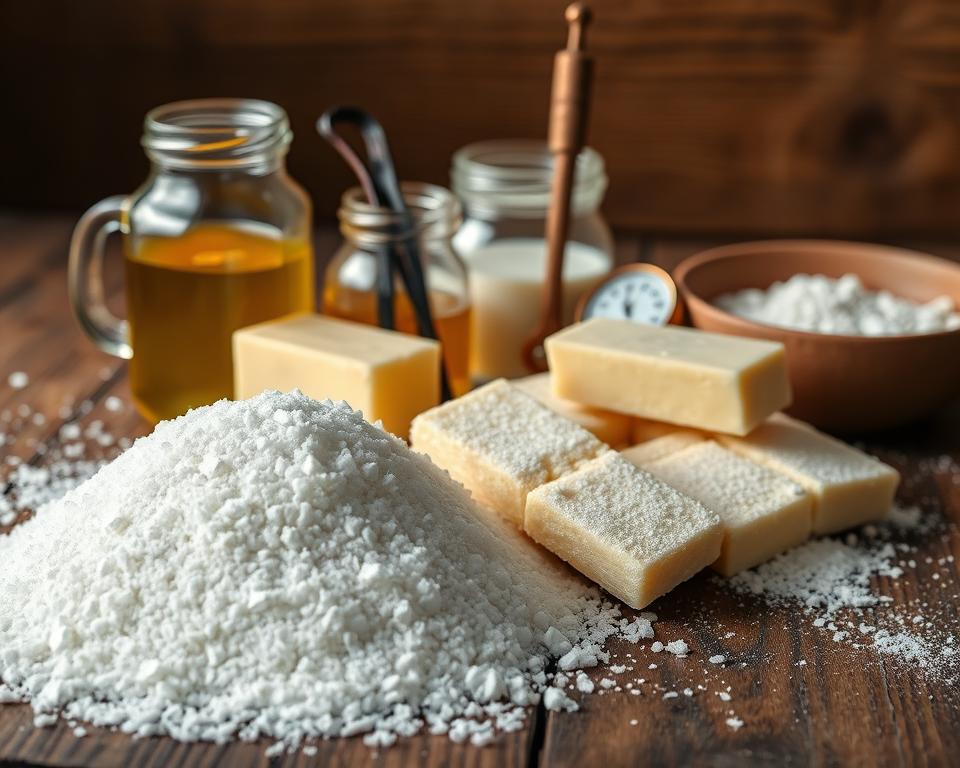
Four simple components create magic. You’ll need:
- 400g granulated sugar – the backbone for that signature grain
- 200ml semi-skimmed milk – adds creaminess without overwhelming richness
- 1 x 397g tin condensed milk – my secret weapon for velvety texture
- 100g unsalted butter – quality matters here, opt for a rich golden variety
Cheaper condensed milk brands often skimp on milk solids. Splurge on the good stuff – it makes all the difference when boiling your mixture.
Equipment and Setup
Your tools are partners in this sugary dance. A heavy-based pan distributes heat evenly, preventing those dreaded burnt patches. I’ve scorched enough batches to know thin pans are false economy.
Keep a wooden spoon handy for constant stirring – metal conducts too much heat. Line your 20cm square tin with baking parchment beforehand. Trust me, scrambling to do this mid-boil leads to tears (and messy counters).
Clear your workspace. Once things start bubbling, you’ll want everything within arm’s reach. That butter wrapper you meant to bin? It’ll become a sticky nuisance faster than you can say “sugar thermometer”.
Traditional Scottish Tablet Recipe: A Step-by-Step Guide
Getting the texture just right feels like conducting a sugary orchestra – every movement matters. I’ve burnt my share of batches learning these steps, but trust me, once you nail the rhythm, it becomes second nature.
Mixing, Boiling and Achieving the Right Consistency
Start by melting 100g butter with 200ml milk in your heaviest pan. Gradually stir in 400g sugar until it dissolves completely – no gritty bits. This is where patience pays. Rush it, and you’ll end up with crystals in your final batch.
Once smooth, pour in the condensed milk slowly, keeping the mixture moving with a wooden spoon. When bubbles form, reduce the heat slightly. Now the real work begins – stir non-stop for 12-15 minutes as it thickens. Watch for a honey-gold colour and temperatures hitting 118°C on your candy thermometer.
| Stage | Temperature | Visual Clue |
|---|---|---|
| Sugar Dissolved | 100°C | Clear liquid |
| Soft-Ball Stage | 118°C | Pale caramel |
| Overcooked | 125°C+ | Dark amber |
Final Setting and Cutting into Squares
When your thermometer hits the magic number, remove from heat immediately. Let it settle for a minute – you’ll see the surface dull slightly. Pour into a greased 20cm tin, smoothing the top with your spoon’s back.
Wait 45 minutes until warm but set. Score lines gently with a buttered knife, then leave to cool completely. The secret to clean cut squares? Dip your blade in hot water between slices. Store in wax paper – if there’s any left to store!
Mastering the Consistency and Texture
The magic happens when sugar crystals dance between creamy and crumbly. Through countless batches, I’ve learned texture makes or breaks this sweet. Get it right, and you’ll experience that signature melt with just enough bite – like shortbread meeting fudge in perfect harmony.

Beating the mixture vigorously does two things. It aerates the sugar blend while controlling crystal size – tiny ones create smoothness, larger ones give that satisfying grain. My trick? Listen for a soft hiss as you stir, like waves retreating over pebbles.
Here’s how to spot trouble. A grainy mix feels gritty under your spoon and sets too quickly. The ideal blend flows like slow honey off the utensil. If yours looks more sandcastle than silk, don’t panic. Gently reheat while stirring – sometimes a second chance works wonders.
Patience pays when setting. Rushing the cooling stage leads to cracks or stickiness. Wait until the surface loses its shine before scoring. That first clean snap of the knife? Pure satisfaction. Even if your initial attempts aren’t perfect, each batch builds skill. Remember – masters aren’t born, they’re stirred.
Temperature and Timing: Keys to Success
Mastering this sweet isn’t magic – it’s science with a wooden spoon. Through scorched pans and crystallised disasters, I’ve learned precision separates gritty failures from that perfect crumbly melt. Let’s break down the two elements that’ll make or break your batch.
Using a Candy Thermometer
That 118°C mark? It’s non-negotiable. Go lower, and your mixture stays gooey. Higher, and you’ll crack teeth on caramelised sugar. Clip your thermometer to the pan’s side, ensuring it doesn’t touch the base. I learned this the hard way after three faulty readings.
Watch the mercury climb like your treat depends on it – because it does. At 110°C, the milk proteins start binding. By 115°C, sugar crystals form structure. Hit 118°C, and immediately kill the heat. Any delay risks overcooking.
| Stage | Action | Visual Clue |
|---|---|---|
| 100°C | Dissolve sugar | Clear liquid |
| 115°C | Monitor closely | Pale bubbles |
| 118°C | Remove immediately | Golden sheen |
Effective Stirring Techniques
Your spoon isn’t just mixing – it’s preventing disaster. Constant motion stops the milk from catching and sugar from crystallising unevenly. I use a figure-eight pattern, scraping edges where heat concentrates.
Arm aching? That’s normal. But pause longer than 10 seconds, and you’ll get burnt patches. If your wrist needs respite, recruit a helper. My partner’s job is taking over when I need to blink – true kitchen teamwork.
Timing’s crucial here. Twelve minutes of vigorous stir creates the ideal texture. Set a phone timer, but don’t trust it blindly. Watch for the mixture thickening like loose honey. When it coats the spoon without dripping quickly, you’re golden – literally.
Tips to Avoid Common Errors
Even seasoned cooks can stumble when chasing that elusive melt-and-crunch balance. Through trial and (many) errors, I’ve cracked the code to sidestepping kitchen disasters. Let’s tackle the twin terrors of grainy texture and scorched pans head-on.
Troubleshooting Graininess and Overcooking
That sandy mouthfeel? It’s usually sugar crystals forming too early. Always dissolve granulated sugar completely before boiling – any undissolved grains become nucleation sites. My trick? Rub a drop between fingers. If it feels gritty, keep stirring.
Burnt edges signal uneven heat. A heavy-based pan is non-negotiable. I once ruined a batch using a thin saucepan – lesson learned. Stir in figure-eights, scraping the bottom constantly. When bubbles form, reduce heat slightly but keep stirring.
| Issue | Cause | Fix |
|---|---|---|
| Grainy Texture | Undissolved sugar crystals | Stir longer at low heat |
| Burnt Taste | Thin pan/base heat too high | Use diffuser & stir vigorously |
| Sticky Consistency | Undercooked mixture | Reheat to 118°C |
Timing’s crucial. The second your thermometer hits 118°C, remove heat. I set two alarms – one at 115°C as a warning. If you overshoot, add a splash of milk and re-stir gently. It won’t be perfect, but saves the batch.
For emergency fixes, try this: if cooled mixture feels coarse, blitz briefly in a food processor. It creates a smoother texture for crumbling over desserts. Not traditional, but beats binning your hard work!
Serving and Storing Your Tablet
The real joy comes when sharing your creation. I’ve found presentation transforms humble sweets into cherished gifts. Let me share tricks I’ve gathered from village fetes to family gatherings – simple touches that make your efforts shine.
Presentation and Preservation Ideas
For individual servings, score your slab while slightly warm. Use a ruler and buttered knife to mark 3cm squares – this ensures uniform size. Once cooled completely, slice along the lines. Wrap each piece in waxed paper, twisting the ends like sweet shop candies.
Storing in an airtight tin keeps texture perfect. Line the container with baking parchment, layering pieces with greaseproof paper between tiers. Avoid plastic boxes – they trap moisture, turning your crumbly delight sticky.
| Storage Method | Duration | Best For |
|---|---|---|
| Airtight tin | 3 weeks | Daily treats |
| Parchment-wrapped bundles | 2 months | Gift-giving |
| Freezer-safe bags | 6 months | Long-term storage |
Leftover crumbs needn’t go to waste. Sprinkle them over porridge or fold into vanilla ice cream. My neighbour swears by crumbling them into her scone dough – creates a delightful caramel swirl.
Let your pan cool completely before washing. Burnt-on sugar? Soak with hot water and bicarbonate of soda overnight. Trust me, it’s easier than scrubbing for hours!
Conclusion
There’s something magical about transforming simple ingredients into a treat that’s stood the test of time. Getting that perfect crumble hinges on precise temperatures and patient stirring – trust your thermometer, not the clock. Remember, quality condensed milk and fresh butter make all the difference in nailing the authentic flavour.
Let your creation set undisturbed for at least three hours. Rushing this stage risks a sticky mess. Once cooled, slice with confidence – those clean edges will make you proud enough to print this method for future batches.
I’ve lost count of how many times I’ve shared this treat with friends. Each bite carries whispers of kitchen stories and shared laughter. It’s more than sugar work – it’s keeping a piece of history alive through our taste buds.
Why not whisk up your own batch this weekend? Snap a photo of your golden squares and tag me – I’d love to see how yours turns out. Here’s to sweet successes and the joy of getting it right!