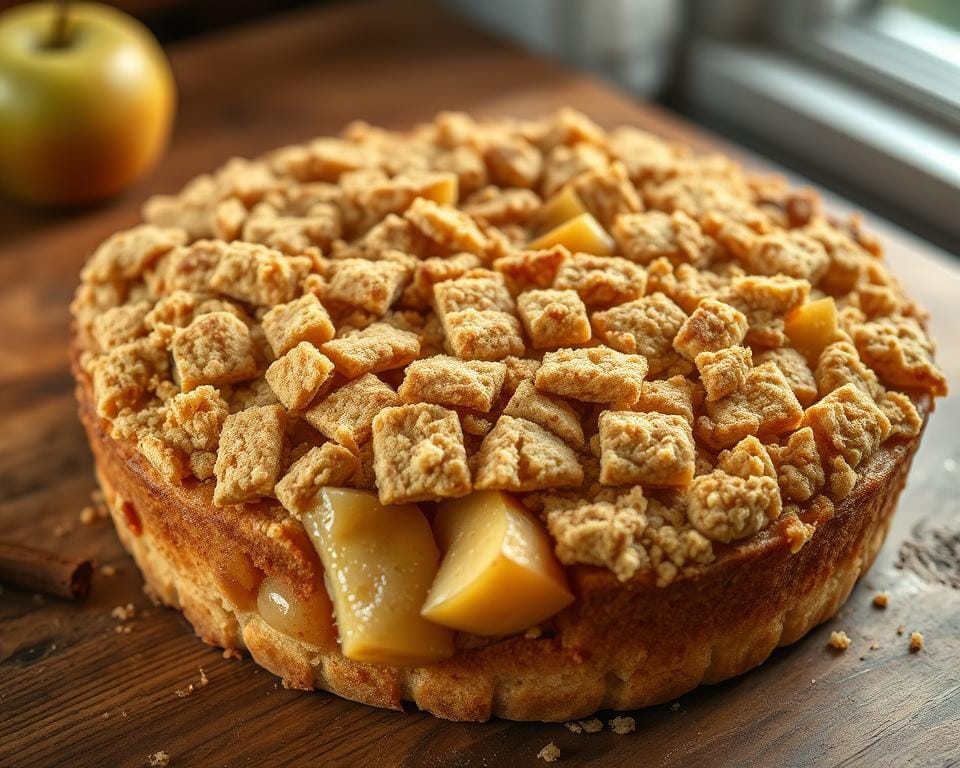
You know the evenings when you want something simple to warm the house and soothe the day; this Rustic Apple Crumble Recipe is exactly that. I’m Gemma, and I’ve baked this pudding on rainy nights across the UK, using a mix of tart Bramley and a sweeter eating apple so the centre goes soft while some pieces hold a gentle bite.
I keep the method unfussy — rub cold unsalted butter into the flour and sugar until it looks like breadcrumbs, squeeze a little lemon over the chopped fruit, then cook on the hob for 10–15 minutes before baking at 180°C/350°F fan. The golden, bubbling top and those syrupy edges are the sign it’s ready.
Key Takeaways
- Use a mix of cooking and eating apples for the best texture and flavour.
- Rub cold butter into dry ingredients for a light, crunchy topping.
- Squeeze lemon over the fruit to keep the colour bright.
- Bake at 180°C/350°F fan until golden and bubbling — about 25–30 minutes.
- Serve warm with custard or a scoop of vanilla ice cream for contrast.
Why this apple crumble is my go-to cosy bake
There are nights when time is short and comfort is everything — this pudding answers both.
I make it when I want something soothing without fuss. Prep takes about ten calm minutes, then it bakes while I set the table.
A warm, simple pudding with real British comfort
The apples soften into a spoonable filling but keep a fresh bite thanks to a splash of lemon and a whisper of cinnamon. Brown sugar adds a gentle caramel note and butter makes the topping golden and crackly.
- Quick prep and a short bake make it weeknight-friendly.
- Works with or without oats for a different texture.
- Serve with a scoop of ice cream or warm custard.
| Feature | Why it helps | When to use |
|---|---|---|
| Brown sugar | Adds caramel depth | Any season, especially fall |
| Cinnamon | Optional warmth | Chilly evenings |
| Butter topping | Golden, nubbly crumbs | For a crisp finish |
Ingredients for the crumble topping and apple filling
Good fruit and a neat topping make all the difference — here’s what I keep on hand.

Apples: best varieties and the perfect sweet-tart balance
Use a combination — Bramley for a soft, saucy base and a firmer eater such as Braeburn or Jazz for little tender bites. This combination keeps the filling both spoonable and textural.
Crumble topping essentials
Keep the topping simple: plain flour, a cup of soft brown sugar if you like deeper flavour, a little caster sugar for extra crunch, and cold unsalted butter rubbed in until it forms crumbs.
- Optional rolled oats add pleasant texture and a nubbly finish.
- A pinch of salt and a little ground cinnamon lift the whole thing — just enough to perfume the kitchen.
Apple filling boosters
Squeeze a little lemon over the chopped apples to stop browning and brighten flavour. Add caster sugar to balance the tart fruit and a pinch of salt to round the taste.
For a glossy, spoonable apple filling use a touch of cornflour or plain flour — both serve the same purpose. Toss everything in a large bowl so you can coat the fruit evenly before it goes in the dish.
| Ingredient | Purpose | Tip |
|---|---|---|
| Bramley + Braeburn | Texture balance | Mix for saucy centre and firm pieces |
| Plain flour | Topping & thickening | Rub cold butter for crumbs; or use to thicken filling |
| Oats | Extra texture | Optional — adds chew and rustic look |
Rustic Apple Crumble Recipe: step-by-step method
I’ll guide you through each stage — from warming the oven to that final rest — so it works every time.
Preheat the oven and prep your baking dish
First, preheat oven to 180°C/350°F fan and butter your baking dish. A hot start helps the topping crisp while the fruit becomes jammy beneath.
Make the apple filling
Peel, core and chop the apples into bite-sized pieces. Toss them in a bowl with lemon, sugar and a pinch of cinnamon so the flavour coats every piece.
Tip the fruit into a pan and cook over medium heat for 10–15 minutes. Stir now and then until the apples begin to soften and a light syrup forms.
Choose your topping style
For a classic finish, rub cold butter into flour and sugar until the texture resembles breadcrumbs.
Short on time? Stir melted butter into the dry mixture with a fork to make quick, chunky clumps.
Assemble and bake
Spread the apple filling in the baking dish, then sprinkle the topping evenly over the top. Leave tiny gaps so steam can escape and the top browns well.
- Slide the dish into the oven and bake for 25–30 minutes.
- Check at 25 minutes — if the top looks pale, give it a few more minutes until the edges bubble.
Timing tips and testing doneness
Test doneness with a spoon: the topping should be crisp and the apple filling tender and saucy beneath. Let the bake rest for a few minutes — that short time helps the mixture set so portions hold together.
| Step | Time | Tip |
|---|---|---|
| Cooking apples on hob | 10–15 minutes | Stir occasionally until syrup appears |
| Bake in oven | 25–30 minutes | Check at 25; look for golden top and bubbling sides |
| Rest | Several minutes | Allow juices to settle before serving |
Simple swaps, seasonal twists, and helpful tips
Seasonal fruit and pantry swaps are my go-to when I want variety without extra fuss. I keep things flexible—use what’s ripe and on hand and you’ll waste less and enjoy more.

Fruit variations to try
Fancy a change? Replace half the apples with rhubarb for a tart lift, pear for mellow sweetness, or blackberries for juicy pops. Mixed fruit works brilliantly in a crowd-pleasing combination.
Oats or no oats
If you like extra crunch, stir oats into the topping for a crisp-like texture. Prefer a classic finish? Keep the topping simple and skip the oats.
Freezer fruit and thickening tips
Using frozen apples? Defrost, strain off excess liquid, then add a touch more flour to the mixture so the juices bake glossy. A squeeze of lemon stops browning if you prep ahead.
- If fruit is very tart, add a spoon more sugar; if sweet, reduce it.
- Both plain flour and cornflour serve the same purpose—to thicken the juices.
- This crumble recipe doubles easily for a larger pie-loving crowd—watch the baking time so the top doesn’t over-brown.
| Swap | Effect | Tip |
|---|---|---|
| Rhubarb | Tart contrast | Mix with sweeter apples |
| Pear | Mellow sweetness | Pairs well with ground cinnamon |
| Oats | Crunchier topping | Use rolled oats for best texture |
How to serve, store, and reheat
Ready to dress this pud for the table? Here’s how to serve it so every mouthful feels like a treat.
Serve with vanilla ice cream, custard, or caramel
I love serving a warm bowl with a scoop of vanilla ice cream — the hot fruit and cold cream meet in the middle for that spoonful you can’t rush.
Custard is the classic partner and caramel is the indulgent one. Drizzle a little over the top for extra shine and depth.
Make ahead, refrigerate, freeze, and reheat guidance
Let the bake cool for about 15 minutes so the juices settle. This helps you serve neat portions from the baking dish.
To store, cover the dish and keep it in the fridge for up to three days. The crumble topping softens but crisps back up in the oven.
- Reheat in the oven until piping hot and the top is crisp again — avoid the microwave if you can.
- Freeze unbaked or baked: wrap well, label, and bake from chilled until the centre is hot; add a few minutes for a deep dish.
- For a crowd, line up bowls and top quickly with vanilla ice cream so the contrast stays perfect.
| Action | Time | Tip |
|---|---|---|
| Rest before serving | 15 minutes | Helps juices set for clean portions |
| Reheat in oven | 10–15 minutes | Bring to piping hot and crisp the top |
| Fridge storage | Up to 3 days | Cover the baking dish to keep moisture in |
Conclusion
After a long day, nothing beats a simple bake that fills the kitchen with scent and comfort. This apple crumble recipe is that small pleasure — honest ingredients, quick prep and a top that turns golden while the filling bubbles.
Preheat oven, toss the fruit in a bowl, mix butter, flour and sugar for the crumble topping and scatter it evenly. Bake until the edges bubble and the top is golden — then rest so the apple filling can set.
I often mix a Bramley with an eater for the best texture. Serve with cream or vanilla ice and share your twist — different pans, fruit swaps or a cup measure for precision all work well.